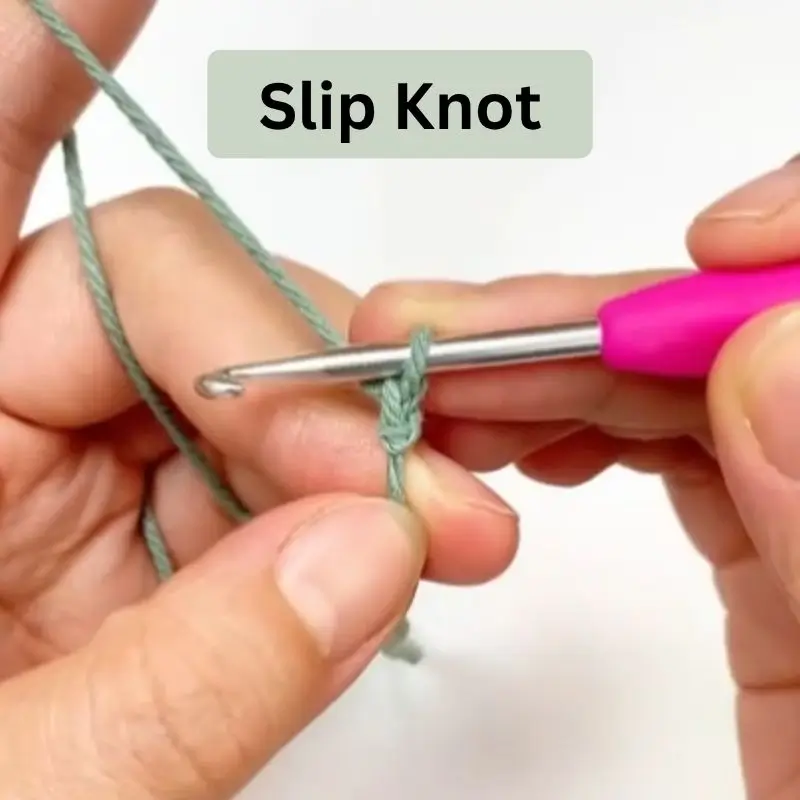
The slip knot is the essential first step in any crochet project. This foundational technique creates the initial loop that secures yarn to hook, setting the stage for all the stitches that follow. Learning how to create a proper slip knot is crucial for beginners starting their crochet journey. Let’s break down this fundamental technique into simple, clear steps.
Materials Needed
- Crochet hook
- Yarn
- A comfortable workspace
Step-by-Step Guide to Making a Slip Knot
Step 1: Prepare Your Yarn and Hand Position
- Take a small section of yarn with your right hand, leaving a few inches as a tail.
- Spread all five fingers of your left hand to create a framework for tension.
- Wrap the yarn around your pinky finger first.
- Guide the yarn across your palm and wrap it around your index finger.
- Hold the yarn tightly with your thumb and middle finger to maintain tension.
- Leave a small section of yarn end to work with.
Step 2: Position Your Crochet Hook
- Hold the crochet hook with your right hand.
- Grip it firmly with three fingers, finding a comfortable position that gives you control.
Step 3: Form the Loop
- Press the yarn from front to back with your hook, creating a point where the strands cross.
- This crossing of strands naturally forms a loop.
- Alternatively, you can achieve the same result by picking up the yarn from back to front.
- Either way, ensure the two strands cross to create a proper loop formation.
- Pinch the crossing point with two fingers of your left hand to stabilize the loop.
Step 4: Complete the Slip Knot
- Insert your hook under the working yarn, wrapping from bottom to top.
- Catch the yarn with your hook and pull it through the loop you’ve created.
- Gently tighten the yarn end by pulling both the working yarn and tail in opposite directions.
- This action forms a secure slip knot around your hook.
- Adjust the tension so the knot isn’t too tight on your hook but secure enough to work with.
Important Tips for Success
- Proper Tension: Your slip knot should be snug but not overly tight on your hook.
- Consistent Practice: Creating a slip knot will become automatic with practice.
- Counting Stitches: Remember that this initial slip knot does not count as a stitch in your pattern.
- Hand Position: Find a comfortable position for your hands that allows for smooth movement.
Moving Forward
Once you’ve mastered the slip knot, you’re ready to proceed with your pattern instructions. Whether you’re creating a simple chain stitch or diving into more complex stitches, your slip knot provides the foundation for everything that follows.
If you want to continue, learn the chain stitch next.
For beginners, it’s helpful to practice making slip knots several times before moving on. The motion will quickly become muscle memory, allowing you to start new projects with confidence and ease.
Conclusion
The slip knot may seem like a small detail, but it’s the gateway to every crochet project you’ll undertake. This simple technique connects you to your yarn and opens up endless creative possibilities. With your slip knot securely in place, you’re now ready to begin the wonderful journey of creating beautiful crocheted items one stitch at a time.